

In this tutorial you wil learn how to add an Autodiscover DNS record using WHM. Versions of Outlook, such as 2013, 2013 and 2019 require a SRV DNS record which allows Outlook to automatically detect the Exchange Server or M365 settings when you setup a new account. With later versions of Exchange this is mandatory, without it, Outlook simply cannot connect.
Table of Contents
Requirements
- You will need access to WHM
- Your account will need access to edit DNS zones
Step 1: Login to WHM
If you are using the WHM management suite and have access to edit the domains then you can easily accomplish this by following the steps below.
Visit the URL of your WHM server, the format is usually like the following;
https://addressofyourserver:2087Login using your WHM username and password.
Step 2: Add the DNS SRV record
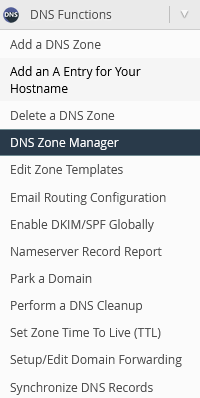
Scroll down to DNS functions and click on DNS Zone Manager like below
Now from the list of domains on the right, click Manage next to the domain you want to add an SRV record for like below

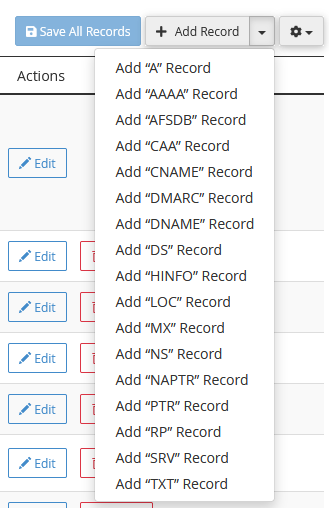
Next on the right hand side, click the Add Record drop down arrow and choose Add “SRV” Record
On the next screen, add the information given to you by your Hosted Exchange provider, in this example we will use rchelipower.co.uk as the domain we are managing, and outlook.myexchangeserver.com as the Exchange server we are connecting Outlook to.
- Name _autodiscover._tcp.rchelipower.co.uk.
- TTL 14400
- Type SRV
- Priority 0
- Weight 0
- Port 443
- Target outlook.myexchangeserver.com.
The details should look like this once filled in

Next click save.
Step 3: Test the DNS record is working
For a quick test within Windows, you can open the command prompt and type the following (replace rchelipower.co.uk with your domain)
nslookup -q=srv _autodiscover._tcp.rchelipower.co.ukFor a deeper test, you can use the Microsoft Remote Connectivity Analyzer website to check the new DNS SRV record is active, and that the test can also successfully access the Hosted Exchange server with your DNS details.
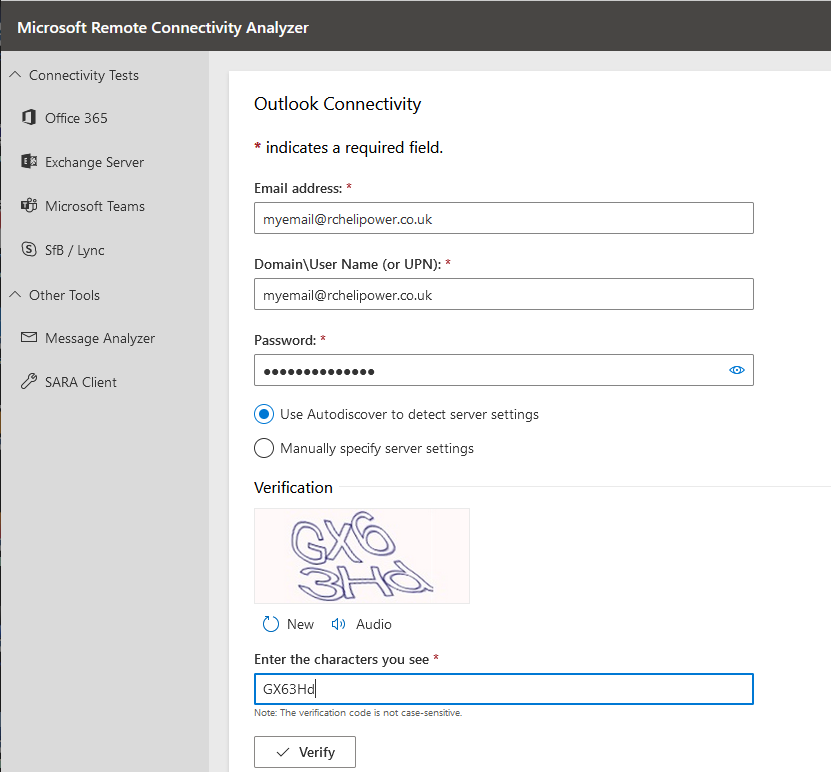
Visit https://testconnectivity.microsoft.com/ and choose the correct test for the service you are connecting to, for example, if you are using Hosted Exchange then choose Exchange Server, then choose Outlook Connectivity

Now enter your email account details that are set in the Hosted Exchange server
Please note, the tests may not work to start with immediately as DNS can take some time to update. If the tests fail, then retry the tests later.
You have now learned how to add an an Autodiscover DNS record for your domain using WHM.