
For versions of Outlook 2016 and above, Microsoft implemented a ‘feature’ known as Outlook Direct Connect. In this guide we will prevent Outlook from bypassing the Autodiscover DNS record so you can continue to use your choice of Exchange Server.
The problem with Outlook Direct Connect is that it instructs Outlook to connect to O365 regardless of what is set in DNS. Although this may be of use to customers who are using O365, for the rest, it can cause a lot of problems, especially if you have a Hybrid Exchange environment.
A Hybrid environment is a typical scenario for larger organisations, where they have thier own internal Exchange Servers and are also using O365.
If you require Hosted Exchange, you can view the options available from Tidyhosts.
Table of Contents
Requirements
- You will need access to use the Registry
- Optional access to the Powershell module
- Optional access to the Command Prompt
- Your Autodiscover DNS records need to be set correctly.
Before you begin
Please use extreme caution when modifying the Registry. Incorrect use can cause damage to your system.
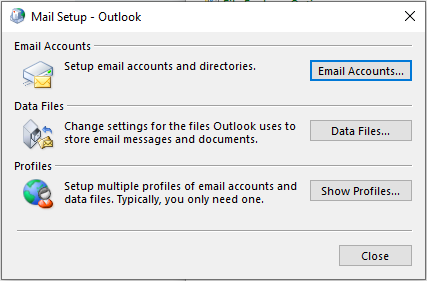
If you have created an Outlook profile and it has failed due to the autodiscover issue, then please ensure you delete the Outlook profile first.
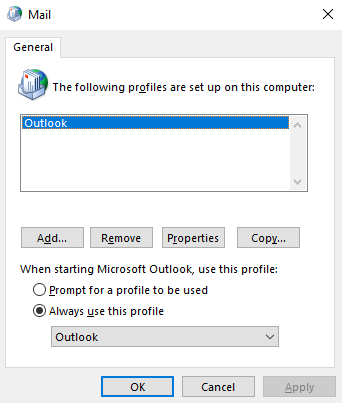
You can go to the control panel and click the mail icon to remove the profile, once opened click on ‘Show Profiles’.
Now click remove on the profile listed. If you have multiple profiles, please ensure you remove the correct one.
Solution 1: Registry
Step 1: Find and open regedit
Go to the Windows search icon at the bottom left of the screen, type in ‘run‘, click on the run app, then type regedit.exe in the run window and press enter.
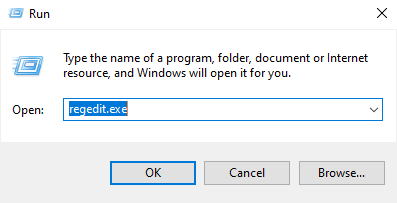
You may be prompted to allow the device to make change, simply click ‘Yes’.
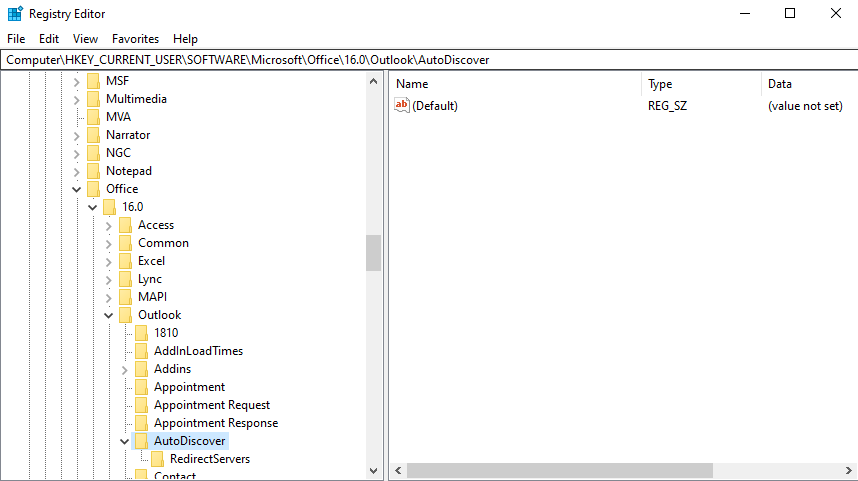
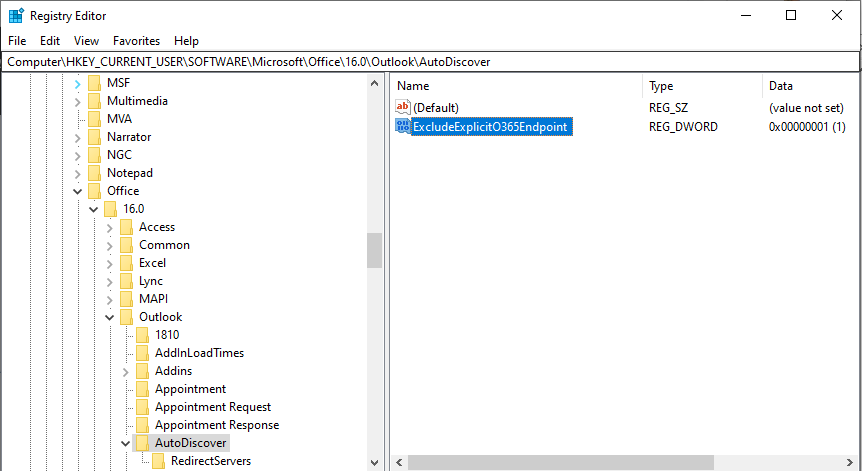
Step 2: Find the AutoDiscover entry
Within the Registry, find the following location:
HKEY_CURRENT_USER\SOFTWARE\Microsoft\Office\16.0\Outlook\AutoDiscoverWithin the registry, it will look like this:
Step 3: Create a new entry
Right click on the AutoDiscover key, select new, then choose DWORD (32-bit) Value. Whilst the new value is still highlighted, change the name to ExcludeExplicitO365Endpoint and press enter.
Next double click on the new entry and change the vavlue to 1 to enable the option.
Once the new entry is added, reboot the machine though in most cases it should not be neccessary.
Now within Outlook, you should able to connect to the Exchange Server set in your Autodiscover DNS record.
Solution 2: Command prompt
If you prefer to add the registry key in the command prompt, you can do this with the use of a simple command.
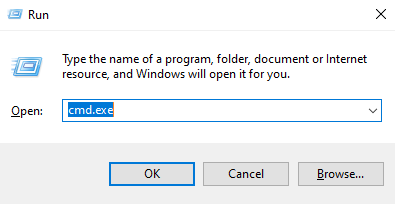
Step 1: Find and open the command prompt
Go to the Windows search icon at the bottom left of the screen, type in ‘run‘, click on the run app, then type cmd in the run window and press enter.
You should now be presented with a black window.
Step 2: Enter the command
We will add the registry key using the following command, be sure to press enter after typing it in:
reg add HKEY_CURRENT_USER\Software\Microsoft\Office\x.0\Outlook\AutoDiscover /t REG_DWORD /v ExcludeExplicitO365Endpoint /d 1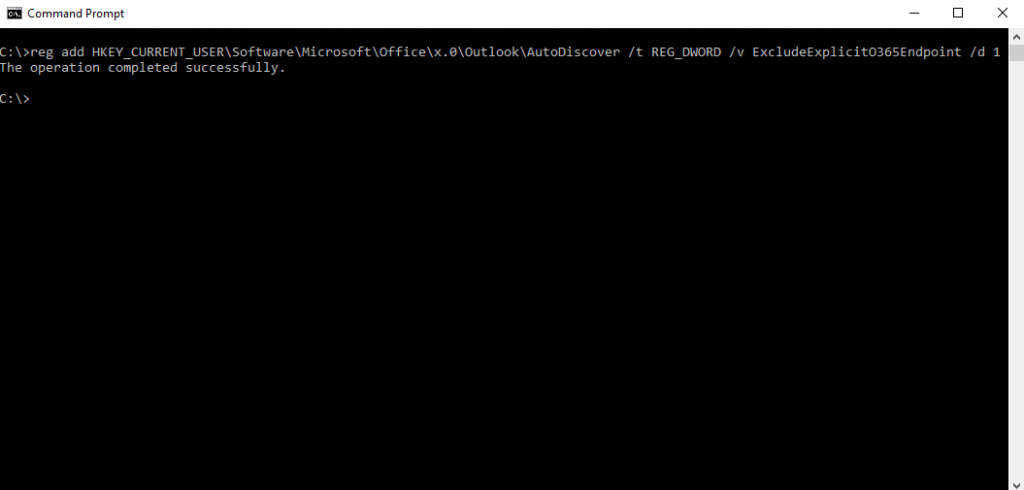
Once the command is entered, you should now see a ‘The operation completed successfully’ message.
Now reboot the machine.
Solution 3: Powershell
You can use Powershell to add the registry entry, this is a similar process to Solution 2.
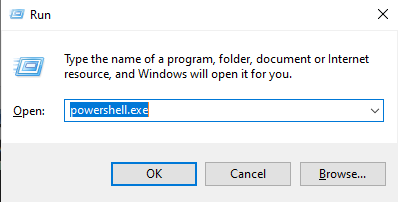
Step 1: Find and open Powershell
Go to the Windows search icon at the bottom left of the screen, type in ‘run‘, click on the run app, then type powershell in the run window and press enter.
Step 2: Enter the powershell command
We will now add the regsitry key using the following powershell command, be sure to press enter after tpying it in:
Set-ItemProperty -Path "HKCU:\Software\Microsoft\Office\16.0\Outlook\AutoDiscover" -Name 'ExcludeExplicitO365Endpoint' -Value 1 -Type DWORD –Force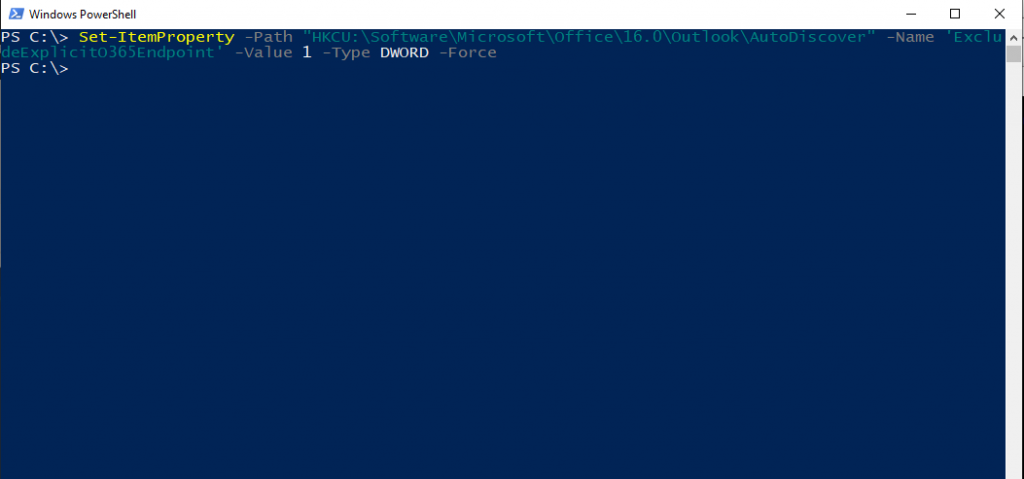
Once the command has been entered, reboot the machine.
You have now learned how to prevent Outlook from bypassing autodiscover. If you have any questions, please contact our support team.