
In this tutorial you wil learn how to create a Shoutcast radio station. Starting your own radio station can be a dream for a lot of people due to the potentially expensive equipment required to get up and running, however these days it can be very simple and easy to do.
There are various ways of creating a radio station, the most popular method today is using the internet.
Table of Contents
Requirements
- A Shoutcast Server – This is where your listeners will connect to and listen in.
- Winamp – The source of your music stream
- Shoutcast DSP plugin – a plugin for Winamp
- A good internet connection
- Music that you wish to stream
Before you begin
For this tutorial, you will need a Shoutcast server. You can can order a Shoutcast server from Tidyhosts. We highly recommend you get a high quality bit rate server such as 128kbps.
In the modern world, listeners are used to high quality streams, therefore to keep your audience engaged, this step should be highly considered before advertising your new station.
Overview Of The Requirements
Let’s have a deeper look at the requirements, these are essential if you want a good quality station that will grow.
Shoutcast Server
As previously mentioned, this is basically the hub where you as the broadcaster will stream your music to. It allows the listeners to connect their player of choice to your music stream.
Before proceeding with setting up your station, please ensure you have your Shoutcast server ready.
Winamp
This is the software that needs to be installed on your desktop/laptop and acts as the music source for your station.
You can download the latest Winamp installer from here Download
Shoutcast DSP plugin
The Shoutcast DSP plugin is an addon piece of software for Winamp. Once installed you have the options to add Shoutcast streams to send your music to. The plugin encodes the music to a readable format and bitrate for the Shoutcast server.
You can get the plugin from here Download
A Good Internet Connection
If you plan to stream at a good quality bitrate such as 320 kbps then you will need a good and stable internet connection. We cannot stress enough how important this is.
If your connection has latency or flapping issues then you will quickly lose your audience. The automated Shoutcast directory may also block the listing in the directory if it detects the server going offline and online so please ensure your connection quality is stable.
Music
Everything is now ready, the Shoutcast server is up, Winamp is configured, all you need now is quality music for your listeners. What you stream is entirely up to you, make sure it is clear and can be easily heard.
Having your input volume to low will put listeners off, whilst having it too high will cause distortion, so test with friends before starting to stream.
Once you have decided what you want to broadcast, try and do some online advertising using social media such as Facebook and Twitter.
Remember, word of mouth is a great advertising tool, produce a great show and the listeners will increase before you know it.
Step 1: Set up the Shoutcast Server
Once you have ordered your new Shoutcast server, its time to set it up.
For the purpose of this tutorial, we will assume you have ordered a Shoutcast server from Tidyhosts.
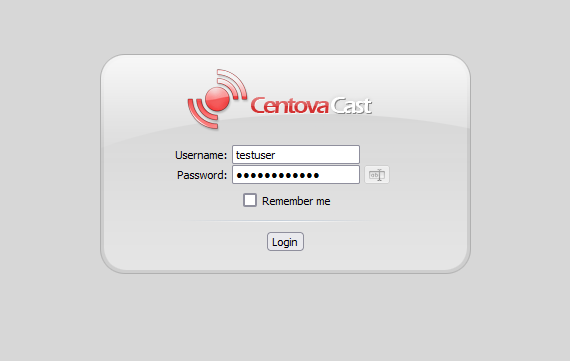
Login to the Centova Cast control panel using the URL we sent you in the welcome email.
Once you have logged in, click on settings on the left-hand side
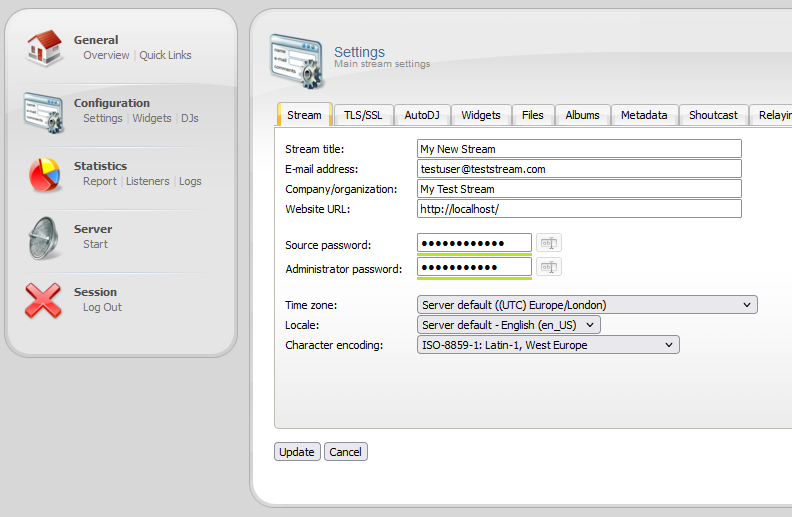
Fill out all the details like in the picture above, replace all the entries to match your new station. You will want a name that is unique and easy to remember. By having a good brand name, your audience will find it easy to remember you and will also help spread the word to other people.
You can either set or view the existing Source and the Administrator passwords. Make a note of the Source password as this will be used when the DSP plug-in is configured.
Next, click on the Shoutcast tab
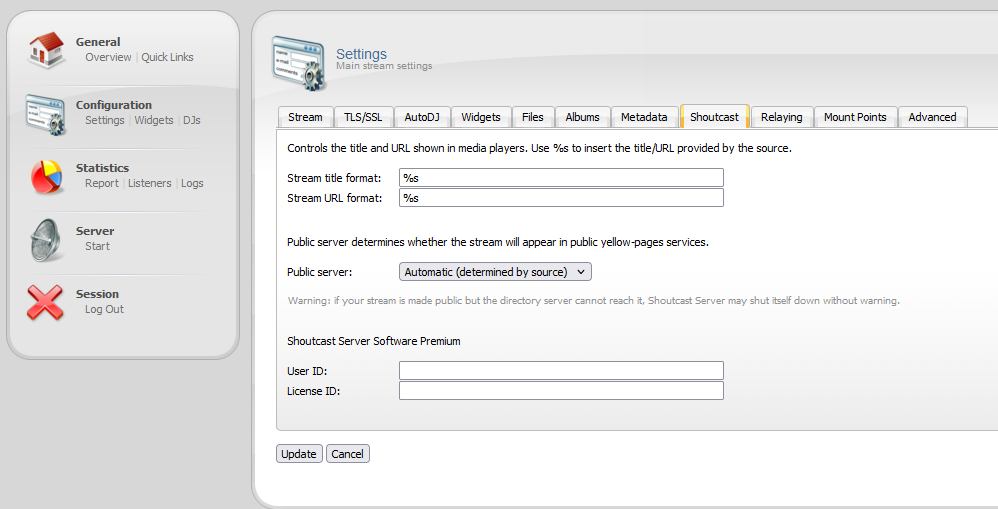
Change the Pubic server option to either Automatic or Always. If you set it to Automatic, the setting will be determined by the source, in our case, the DSP plug-in.
Next on the left, click Start. The server should now be up and running for you to stream to.
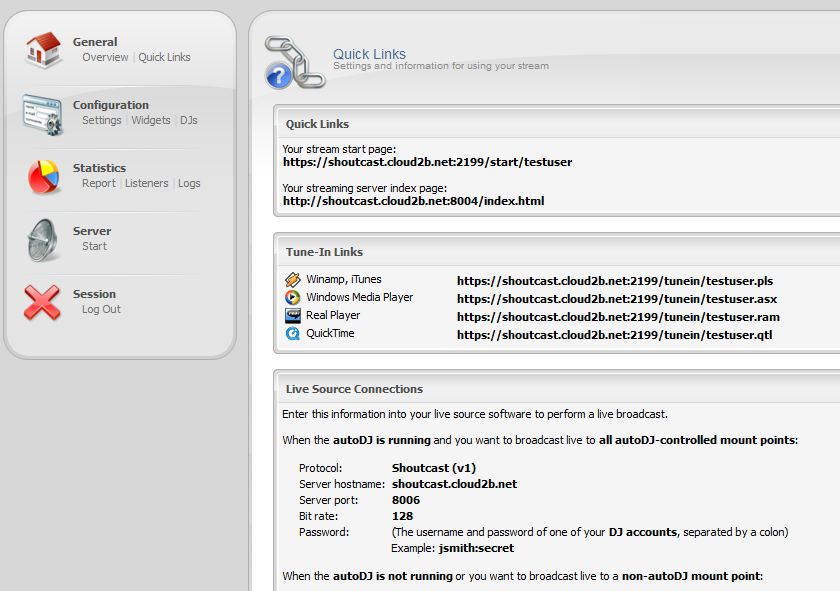
If you click on Quick Links, this will display the port your server is listening on, and also the links your listeners will use to connect in and listen to your stream.
Step 2: Install Winamp
Lets now get the Winamp software installed. The installation is simple to do.
Double click on the downloaded Winamp file to launch the install.
- Cllick ‘Next’ on the welcome screen
- Choose Standard Install, this will install everything you need to ‘C:\Program Files (x86)\Winamp’
- On the welcome screen click ‘Next’
- Choose the skin you want to use
- Click ‘Next’
- Click ‘Finish’
You should then have Winamp installed on your machine.

Step 3: Install the Shoutcast DSP plugin
Lets get the plugin installed that will do the encoding for our streams
- Make sure Winamp is closed
- Double click on the file you downloaded
- Click ‘Next’
- Click ‘I Agree’ to the license agreement
- Choose the default destination folder, unless you installed Winamp it in another location
- Click ‘Install’
- Make sure ‘Set as the default DSP plug-in is ticked and click ‘Finish’
With the plug-in now installed, Winamp will load up another window when you launch the application
Settings
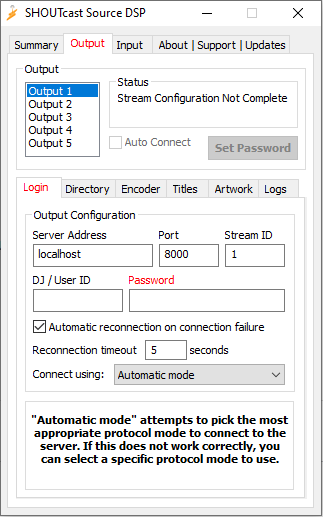
To connect the DSP plug-in to the Shoutcast server, you will need the details from the Quick Links menu within the Centova Cast control panel.
- Server Address (viewable from the Quick Links in Centova Cast control panel)
- Port (viewable from the Quick Links in Centova Cast contro panel)
- DJ / User ID (this is your Centova Cast user login)
- Password (this is your Source password)
Shoutcast Directory
Next, click on Directory and enter the details for your stream. If you choose to make the server public, the stream details will be listed in the Shoutcast directory which will allow listeners on the internet to find your station and listen in.
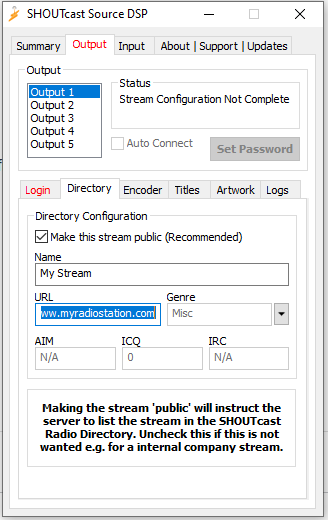
Please note, in order to make the server public, you must now register for an account at www.shoutcast.com. We suggest creating a Freemium account.
You can then create a new station and obtain the Authhash which is required by the Shoutcast software. Please see our knowledge base article here.
Encoder Settings
Next, click on ‘Encoder’ and set the ‘Encoder Type’ to MP3. If you have purchased the plan that allows you to stream at 320kbps then choose that option from the drop-down menu.
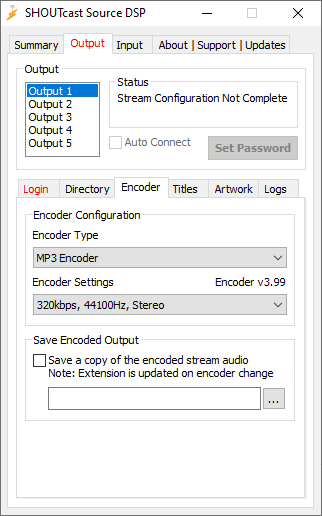
For the moment you can leave everything else set as default. There are other options you can set later on, but for the purpose of this tutorial, the settings just entered will allow you to start steaming.
Now, go back to the ‘Directory’ option, and click connect. The DSP plugin should now be connected and ready to start sending data to the Shoutcast server.
Next, play some music in Winamp, this can be anything you already have.
In the status window, you should be able to see in real-time how much data is being transmitted to the Shoutcast server. The numbers displayed are the total amount of bytes that have been sent.
Step 4: Test Your Stream
Now your Shoutcast server is up and running, Winamp and the DSP plug-in are streaming to the server. Its time to test it.
Ideally you will want to test this on another machine so you can listen to the music on a new connection.
Centova Cast provide a HTML 5 player, so you can load the stream without needing to install anything.
From the Centova Cast control panel, click on Quick Links and copy the URL it displays for ‘Your stream start page’
Now on the other machine, enter that URL into a browser and you should then be presented with the html5 player
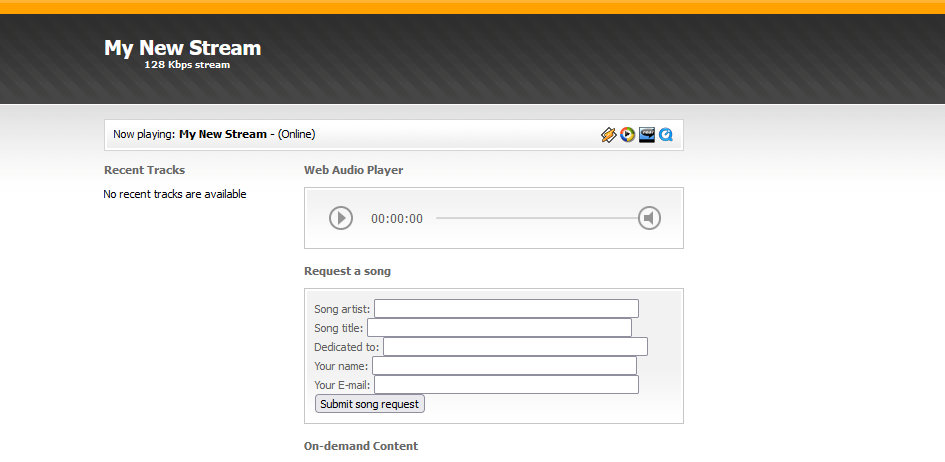
You should now hear your station playing on the other machine. If all is well, you have now successfully created your new internet radio station.
Take the time to learn more about the features for Winamp and Shoutcast. There are many options available to help customise your radio station even further.
If you need any help, please contact our support team who will happily assist you.
You have now learned how to create a Shoutcast radio station.